
How to Prevent PPF Silvering and Lift Lines: A Professional Installer’s Guide
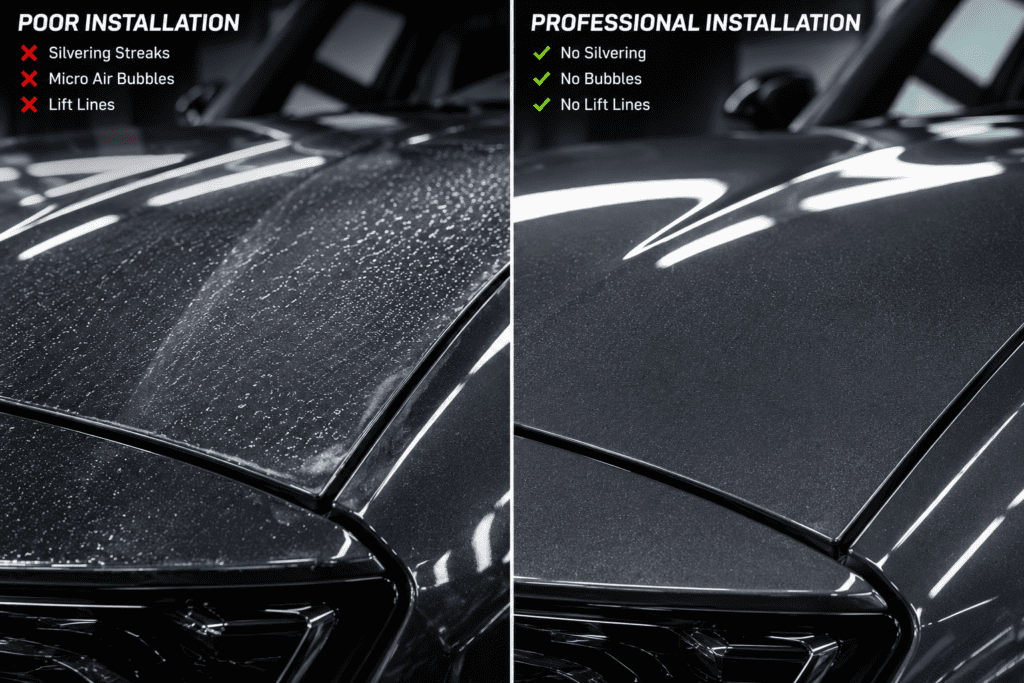
If you have been installing paint protection film for any length of time, then you have probably seen it happen. Faint silver streaks show up under the film right after squeegeeing. Or, even worse, stubborn lift lines appear along the edges and refuse to lay flat no matter what you do.
PPF silvering and lift lines are two of the most common installation defects. However, they are also two of the most preventable. In this guide, we will cover what causes each defect, why standard methods often make them worse, and the specific techniques that professionals use to eliminate them entirely.
What Is PPF Silvering and What Causes It?
PPF silvering is the appearance of tiny, reflective silver-colored streaks or patches under the film surface. Essentially, it looks like fine glitter trapped beneath the paint protection film. This happens because micro-air pockets form between the adhesive and the painted surface during the squeegeeing process.
There are three main causes of PPF silvering, and each one requires a different approach to fix.
1. Over-Stretching the Film
When you stretch PPF beyond its elastic limit — which is roughly 10 to 15 percent — the adhesive layer distorts at the molecular level. As a result, the adhesive develops micro-gaps that trap air. This creates the characteristic silver appearance that installers dread.
Important: This type of PPF silvering is permanent. Heat will not fix it because the adhesive structure itself is damaged. Therefore, the only solution is to remove and replace the film.
2. The Slip Solution Dries Too Fast
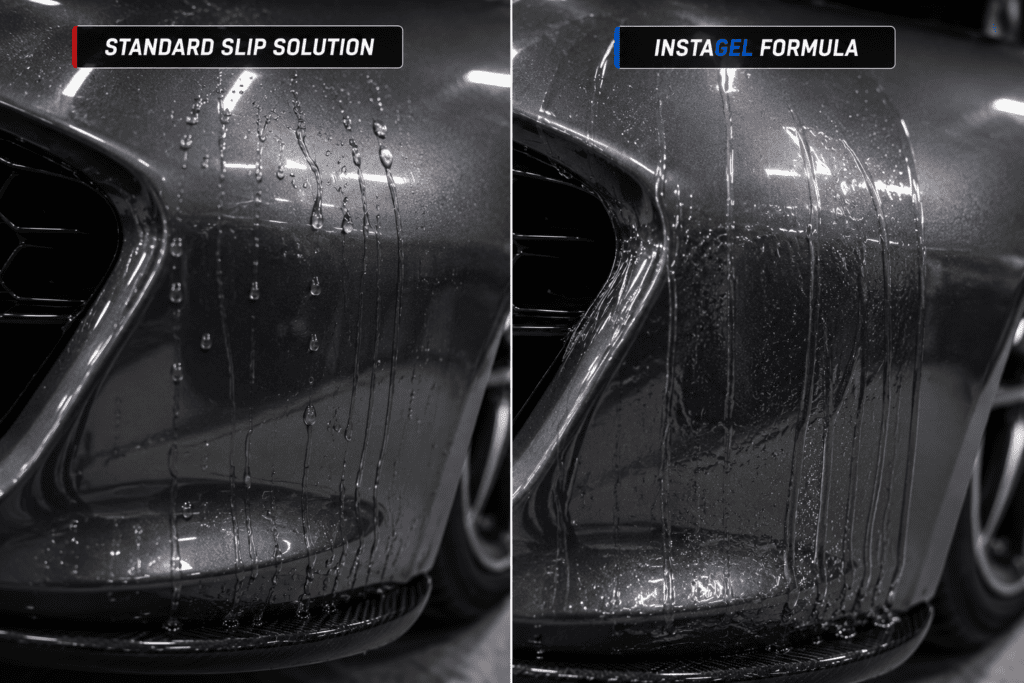
Standard slip solutions like baby shampoo and water tend to evaporate quickly. This is especially true in warm shops or when working on dark-colored vehicles that absorb heat. When the solution dries before you finish squeegeeing, the adhesive grabs the paint too early. Consequently, air gets trapped in the transition zone, which creates those familiar silver streaks.
3. Uneven Squeegee Pressure
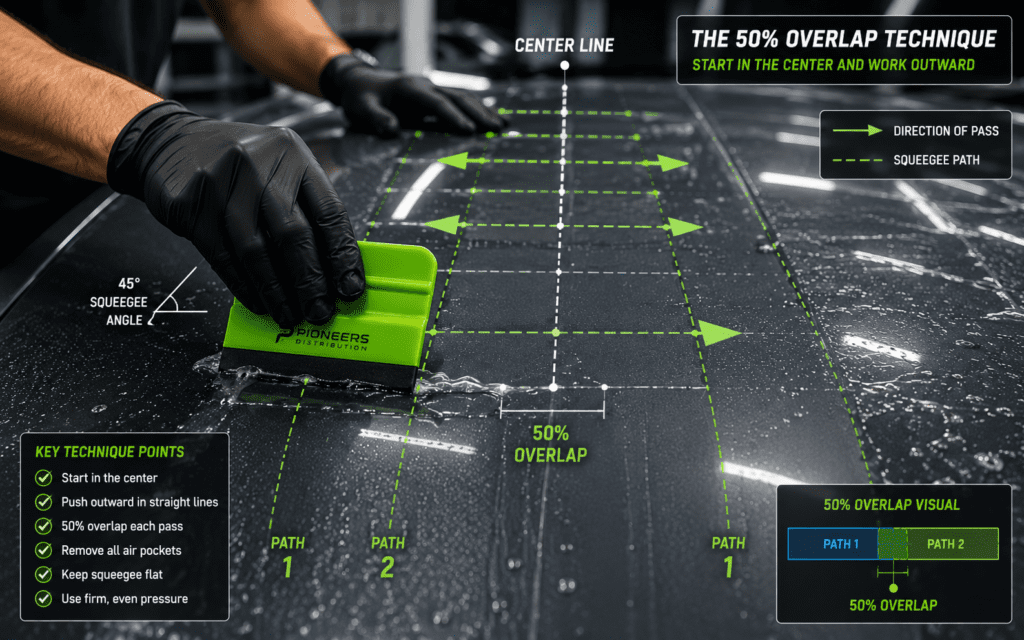
Aggressive or uneven squeegee strokes push the solution out unevenly. Because of this, pockets of air remain trapped under the film. Professional installers avoid this by using firm, consistent, overlapping passes. Specifically, each stroke should overlap the previous one by about 50 percent.
What Are PPF Lift Lines and How Do They Form?
Lift lines are visible lines on the installed film where the PPF lifted slightly and then re-adhered at a different position. In other words, they appear as faint creases or shadows that run parallel to your squeegee strokes or along film edges.
There are three common causes of lift lines:
Not enough tack during squeegeeing. When your mounting solution provides too much slip, the film slides around under squeegee pressure instead of staying locked in place. As a result, each micro-movement leaves behind a visible lift line.
Re-squeegeeing a tacked area. Once the adhesive starts bonding to the surface, running the squeegee over it again lifts and re-seats the film. This always leaves a visible line, so it is important to get it right on the first pass.
Squeegeeing in the wrong direction. If you squeegee toward an edge that has already tacked down, you force air and solution under the bonded area. This lifts the film and creates lines when it settles back down.
5 Professional Techniques to Prevent Both Defects
1. Switch to a Gel-Based Mounting Solution
Without a doubt, the single biggest improvement most installers can make is switching from soap-and-water to a purpose-built PPF installation gel. For example, products like InstaGel offer three key advantages over traditional soap mixes:
- Slower evaporation — Because the gel consistency maintains hydration longer, you get more working time. As a result, premature drying that causes PPF silvering is significantly reduced.
- Predictable tack transition — Unlike soap that dries unpredictably, gel solutions transition gradually from slip to tack. Therefore, lift lines are far less likely to occur.
- Built-in debris management — The viscosity of the gel traps particles and carries them out during squeegeeing. Consequently, contamination-related defects are also reduced.
2. Control Your Stretch
Always limit your stretch to 10 to 15 percent maximum. If a panel requires more stretch than that, then the pattern needs to be re-cut or adjusted. Keep in mind that over-stretched adhesive causes permanent PPF silvering that no amount of heat or re-squeegeeing will ever fix.
3. Master Your Squeegee Technique
Proper squeegee technique is essential for preventing both PPF silvering and lift lines. Here are the key rules to follow:
- First, always work from the center outward — never from the edges inward
- Second, use firm and consistent pressure throughout each stroke
- Third, overlap each stroke by 50 percent to avoid leaving air pockets
- Additionally, never go back over an area that has already begun tacking
- Finally, always lubricate the top surface of the film before squeegeeing to prevent friction marks
4. Control Your Environment
Your working environment plays a bigger role than most installers realize. Therefore, keep these guidelines in mind:
- Maintain your shop temperature between 65 and 75 degrees Fahrenheit
- Also, avoid direct sunlight hitting the vehicle during installation
- On dark vehicles, work in smaller sections so the solution does not dry before you reach the edges
- In addition, use a light spray mist on the film surface to slow evaporation during large panel installs
5. Use Heat Strategically
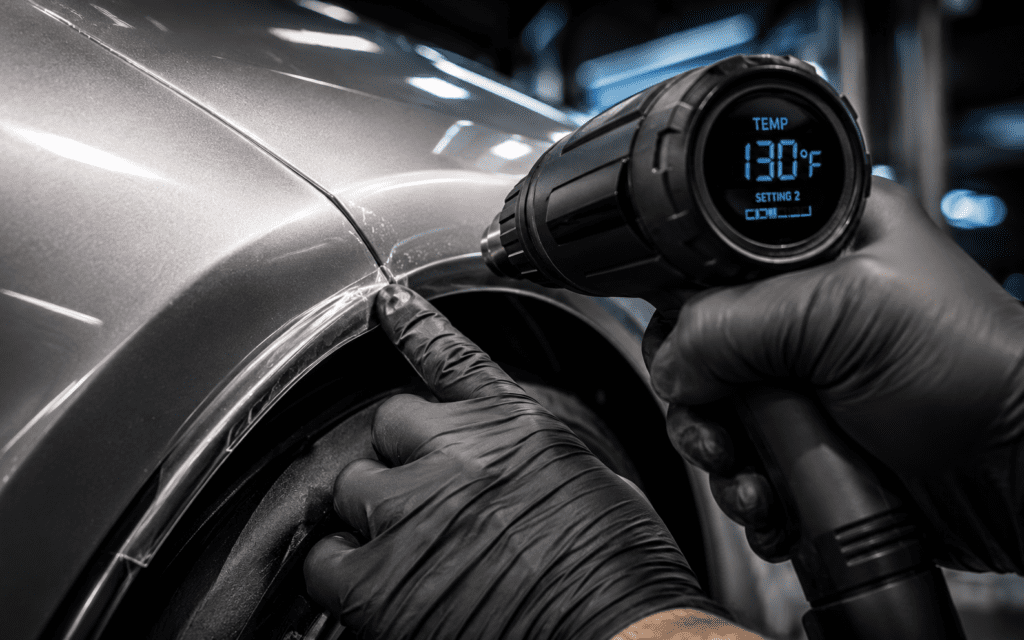
Heat activates the self-healing top coat of PPF and helps the film conform to curves. However, too much heat accelerates evaporation and causes premature tacking. Because of this, use your heat gun at low settings — between 120 and 140 degrees Fahrenheit — and only for final edge tacking and compound curves. In other words, do not use heavy heat during the initial positioning and squeegeeing phase.
What To Do If Silvering or Lift Lines Appear
Even with the best techniques, defects can occasionally happen. Here is how to handle each situation:
For PPF silvering caused by premature drying: Apply gentle heat with a heat gun and re-squeegee the affected area right away. If the adhesive has not fully bonded yet, then the heat will reactivate it and allow you to push the trapped air out. However, this only works within the first few minutes. After that, the bond strengthens and the PPF silvering becomes permanent.
For PPF silvering caused by over-stretching: Unfortunately, the film must be removed and replaced entirely. There is simply no fix for adhesive that has been distorted beyond its elastic limit.
For lift lines: If you catch them early, then gentle heat combined with careful re-squeegeeing from the correct direction can sometimes smooth them out. On the other hand, if the adhesive has fully cured with the lift line in place — which typically takes 24 to 48 hours — then removal and replacement is the only option.
The Right Installation Gel Makes the Biggest Difference
In conclusion, most PPF silvering and lift line problems come down to one root cause: the mounting solution either dries too fast or provides inconsistent tack. A purpose-built PPF installation gel addresses both of these issues effectively.
At Pioneers Distribution, we carry InstaGel — a professional-grade PPF installation gel created by veteran installer Mike Norng. Its viscous formula provides extended working time, controlled slip-to-tack transition, and debris management that standard soap mixes simply cannot match. InstaGel works just as well for window tint installation as it does for PPF.
We also carry InstaSlip — a premium, oil-free and conditioner-free slip solution for PPF and window tint that flushes clean with distilled water and helps prevent the silvering and pre-tack marks covered in this guide. Mix 5-8 mL of InstaSlip per 1 gallon of distilled water as a starting point, adjusting in 1 mL increments per gallon for your desired slip.
We also carry ImporTint Sauce — a sprayable tack solution that works alongside your slip solution for contamination control on window tint installs.
Shop InstaGel at Pioneers Distribution →
Related: PPF Installation Gel vs Slip Solution: Which One Should You Use?